

 Set up docs MCP
This guide is intended for users with the Admin role in ClickHouse Cloud.
ClickHouse Cloud customers may select from pre-defined system roles or create custom roles to assign to users. For more information on system roles and their associated permissions, review Console roles and permissions. This guide provides details for managing custom roles.
Create custom roles
Custom roles can contain a combination of organization, service, and database permissions. Permissions may be applied to all or a subset of services and databases.
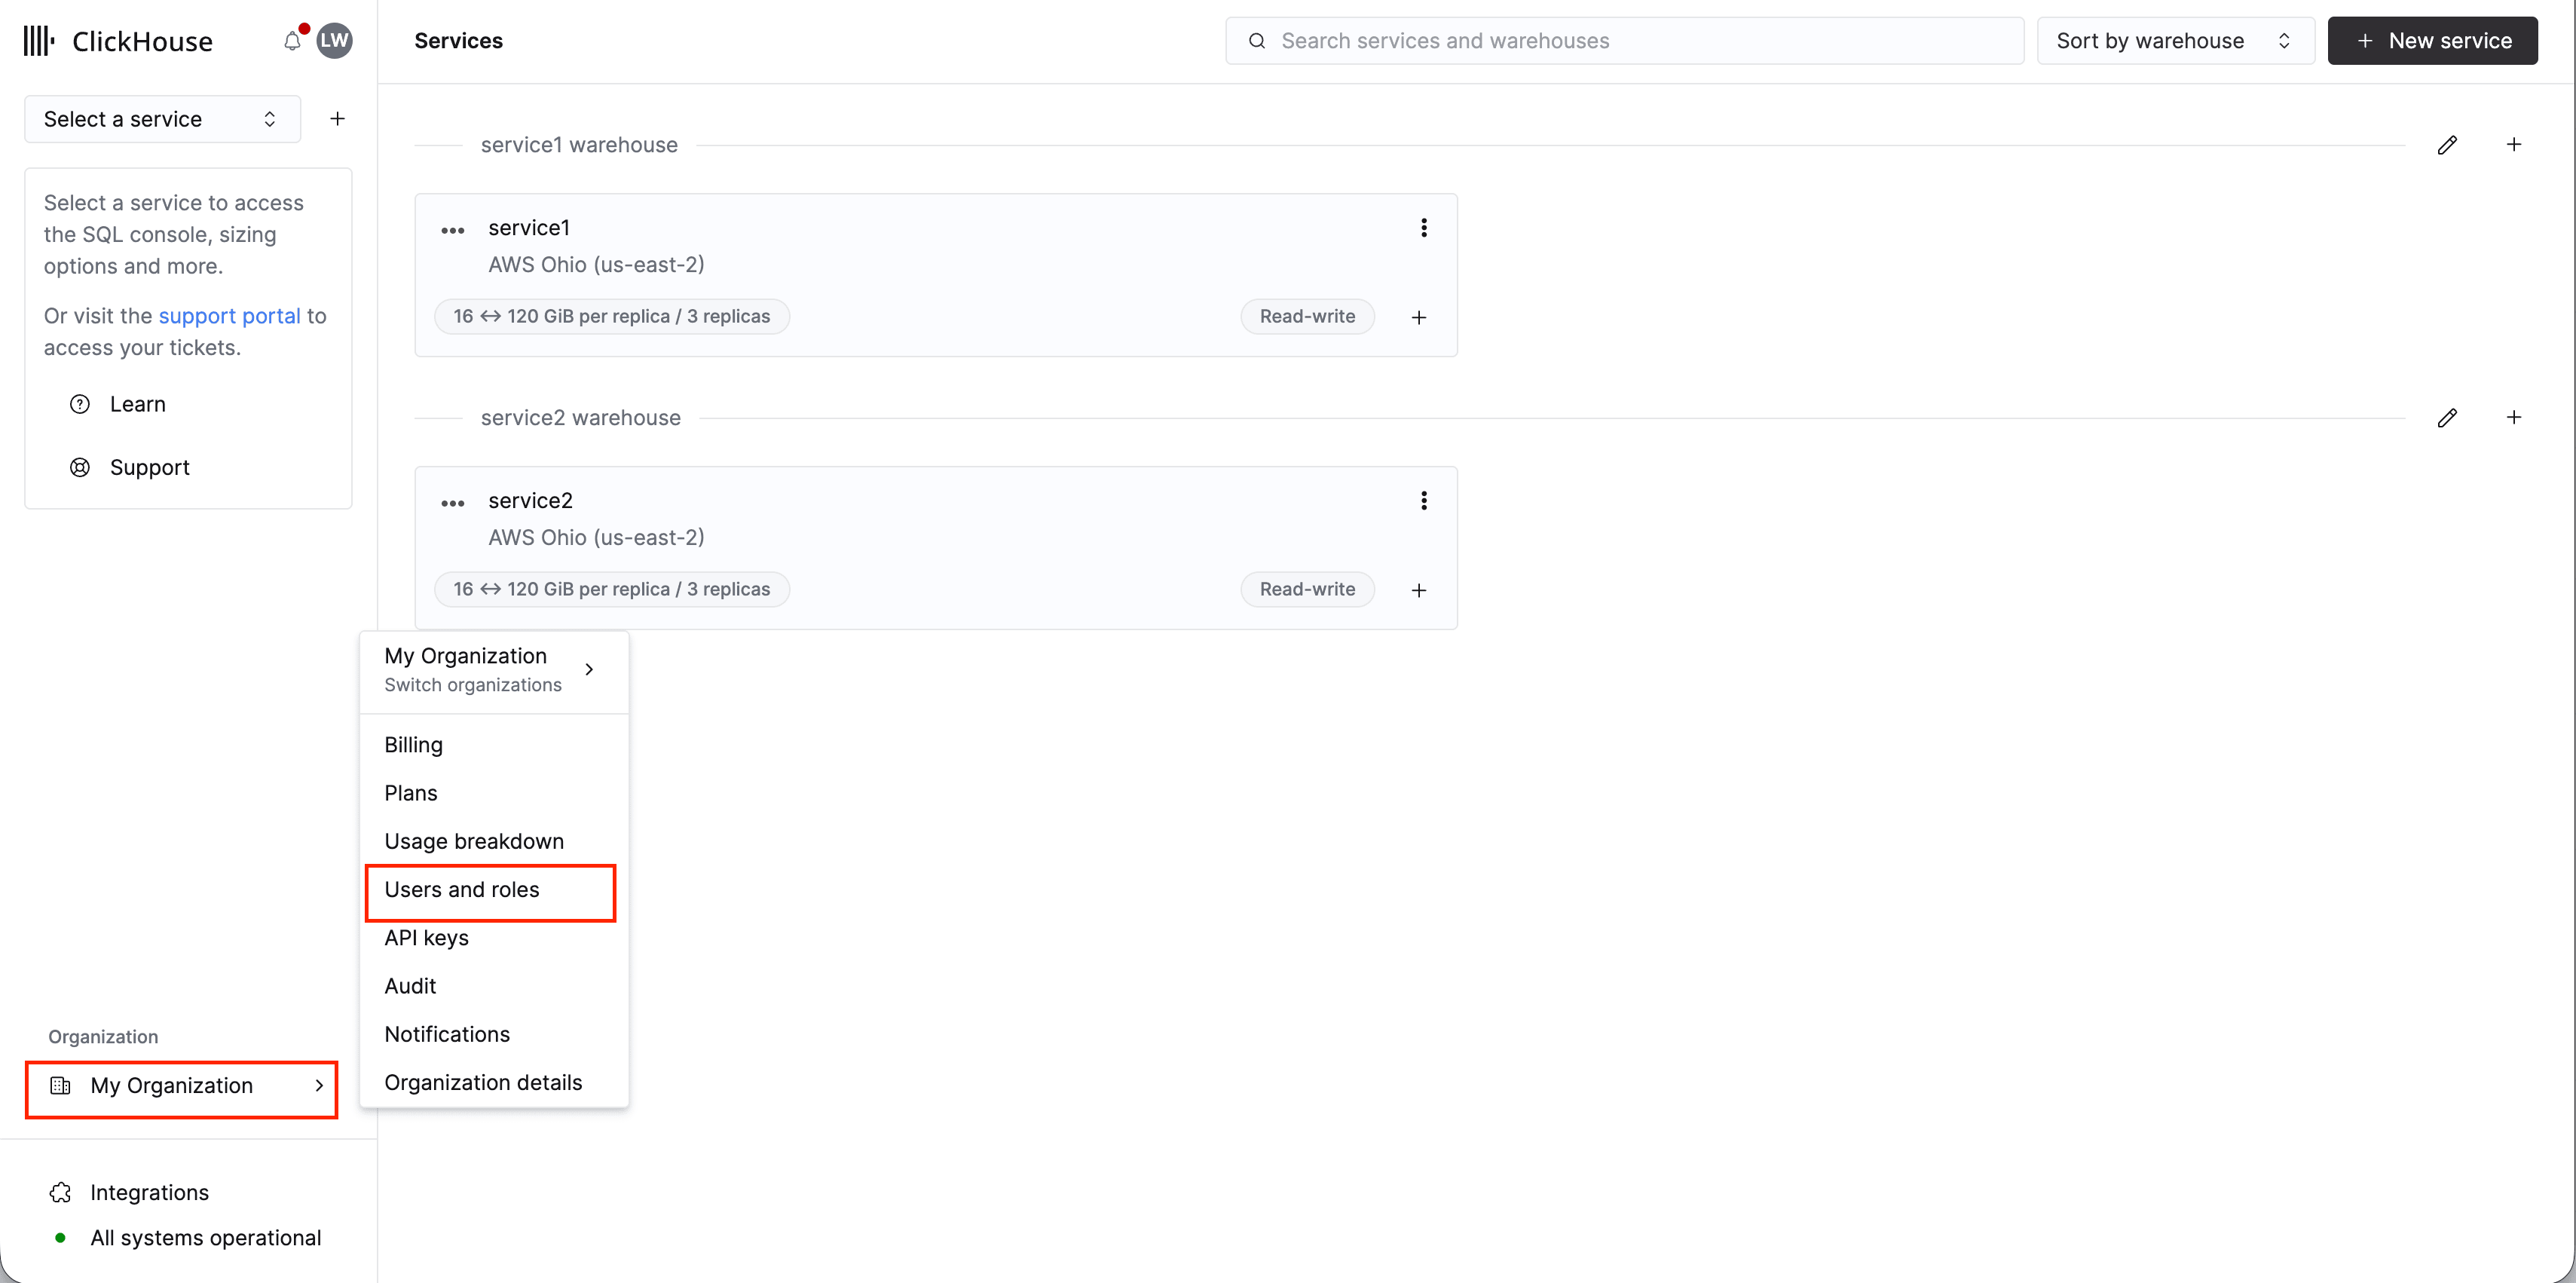
Access organization settings and select Users and roles
From the services page, select the name of your organization. Select the Users and roles menu item from the popup menu.
[object Object]
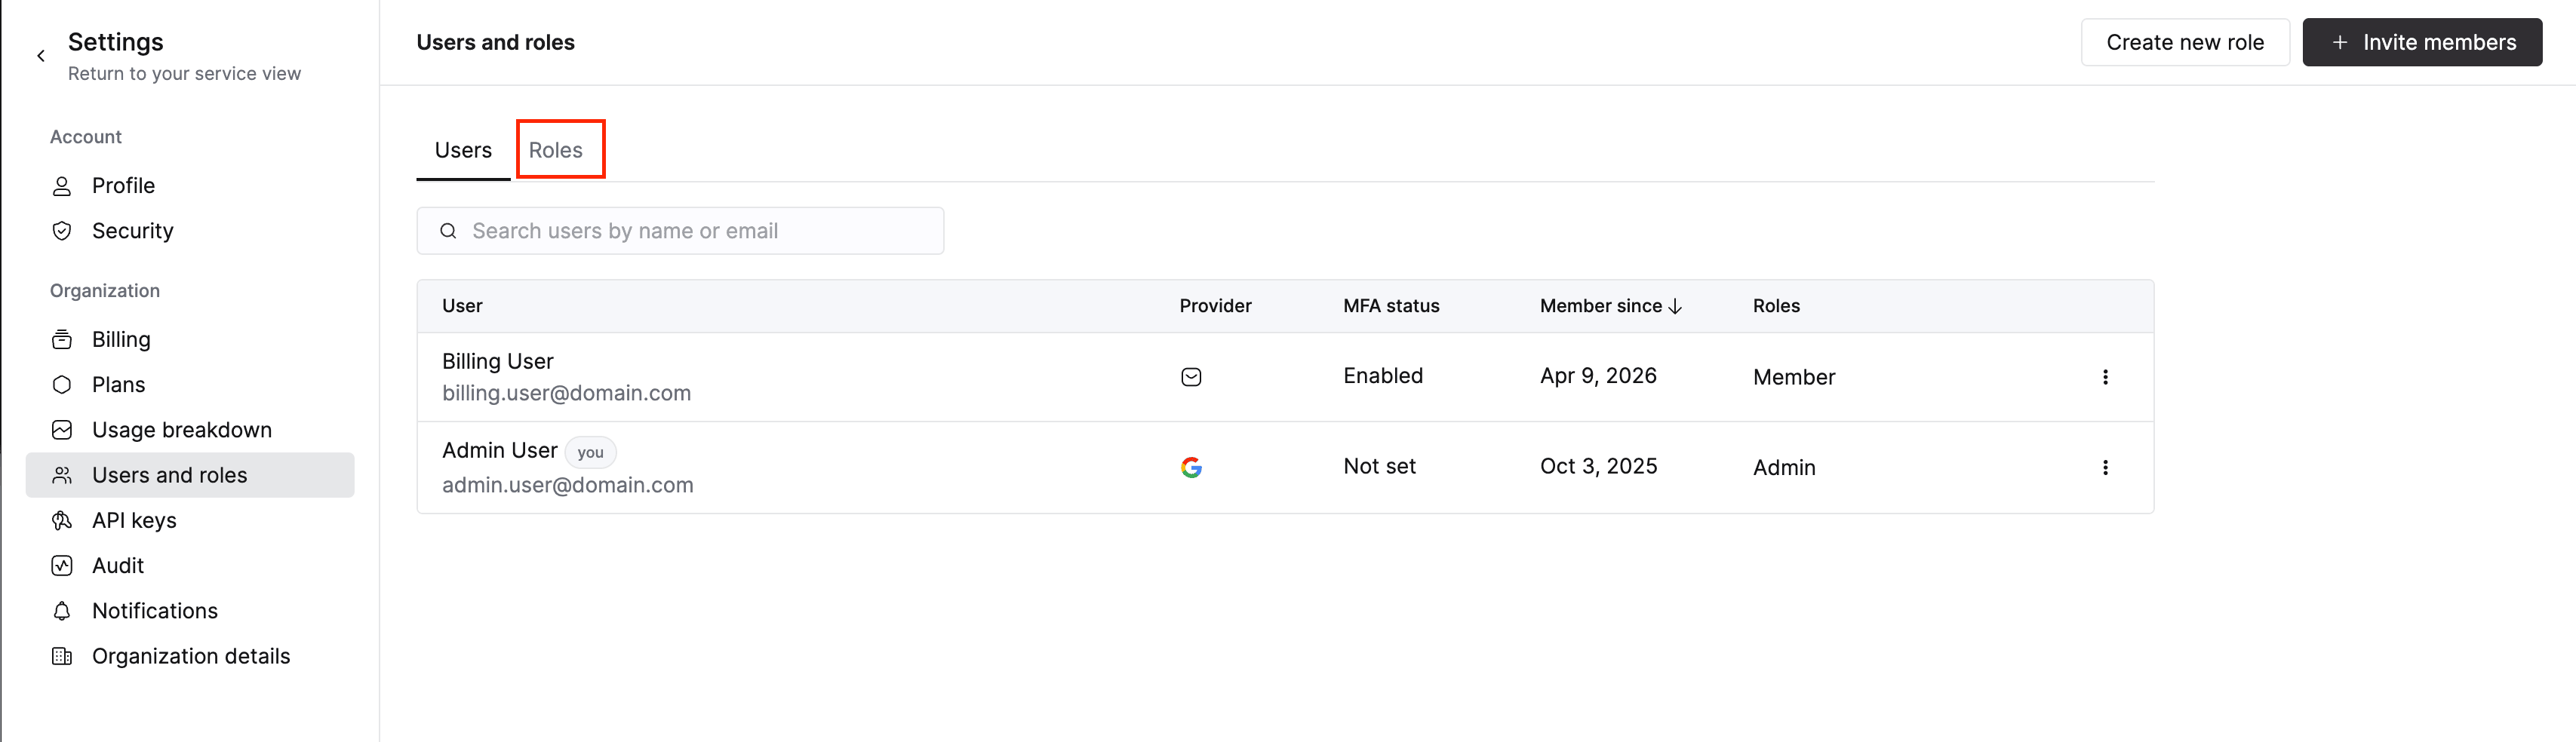
Select the Roles tab from the top middle of the screen.
[object Object]
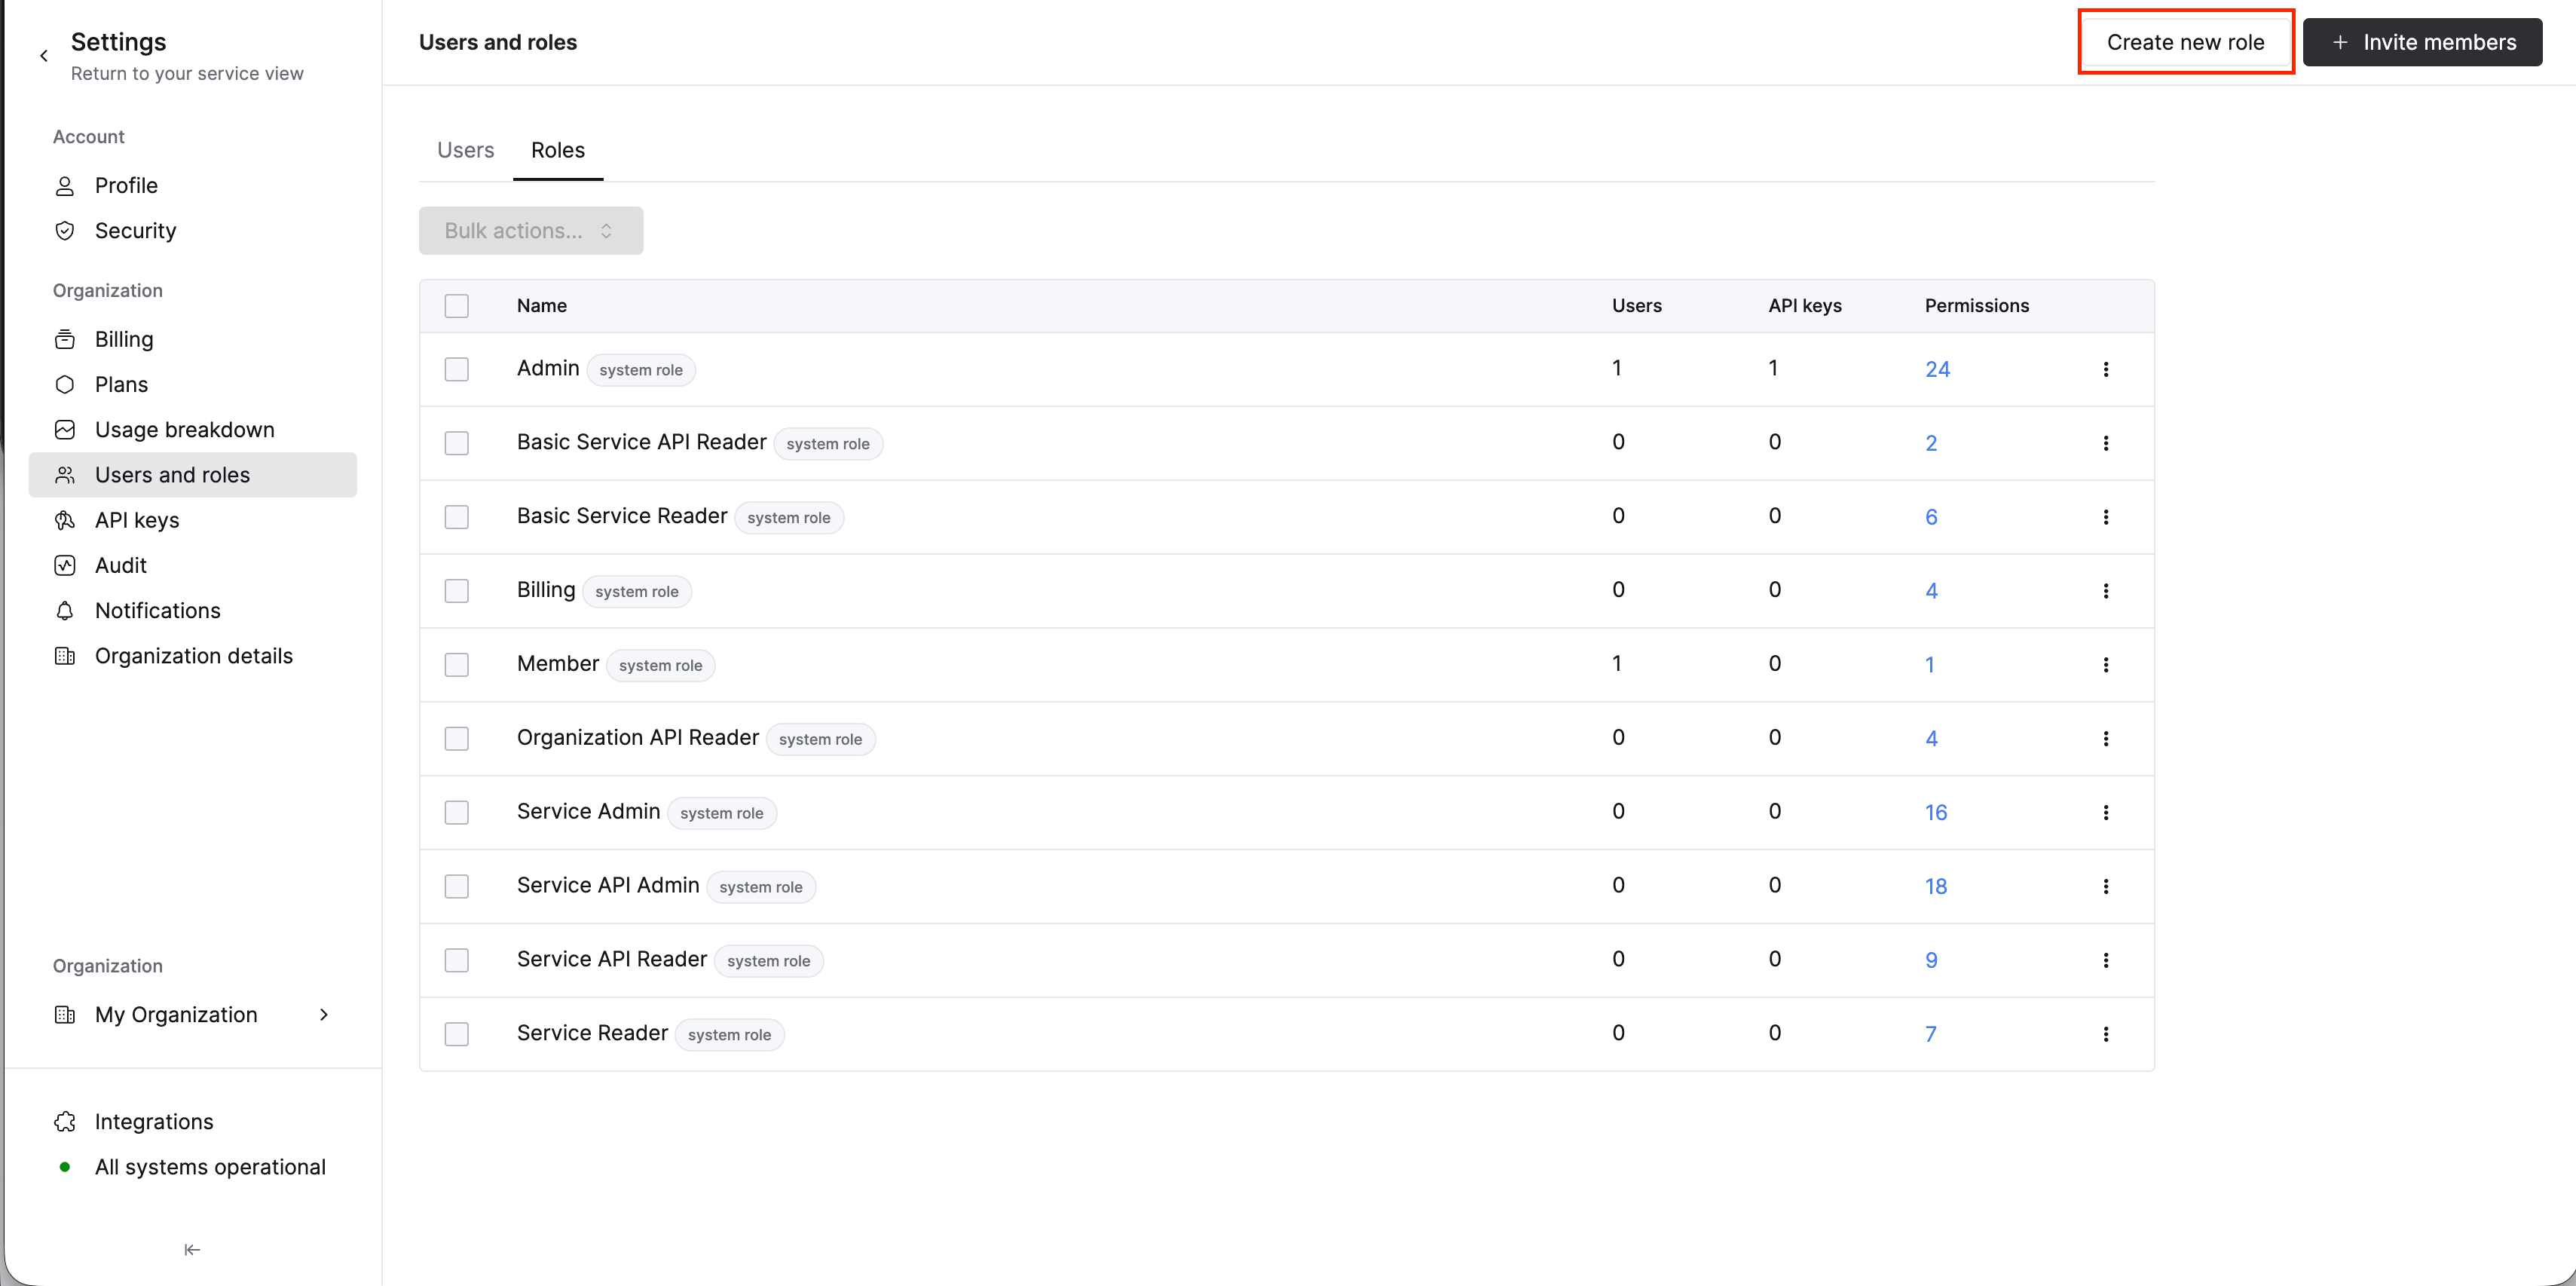
Select the Create new role button in the upper right of the screen.
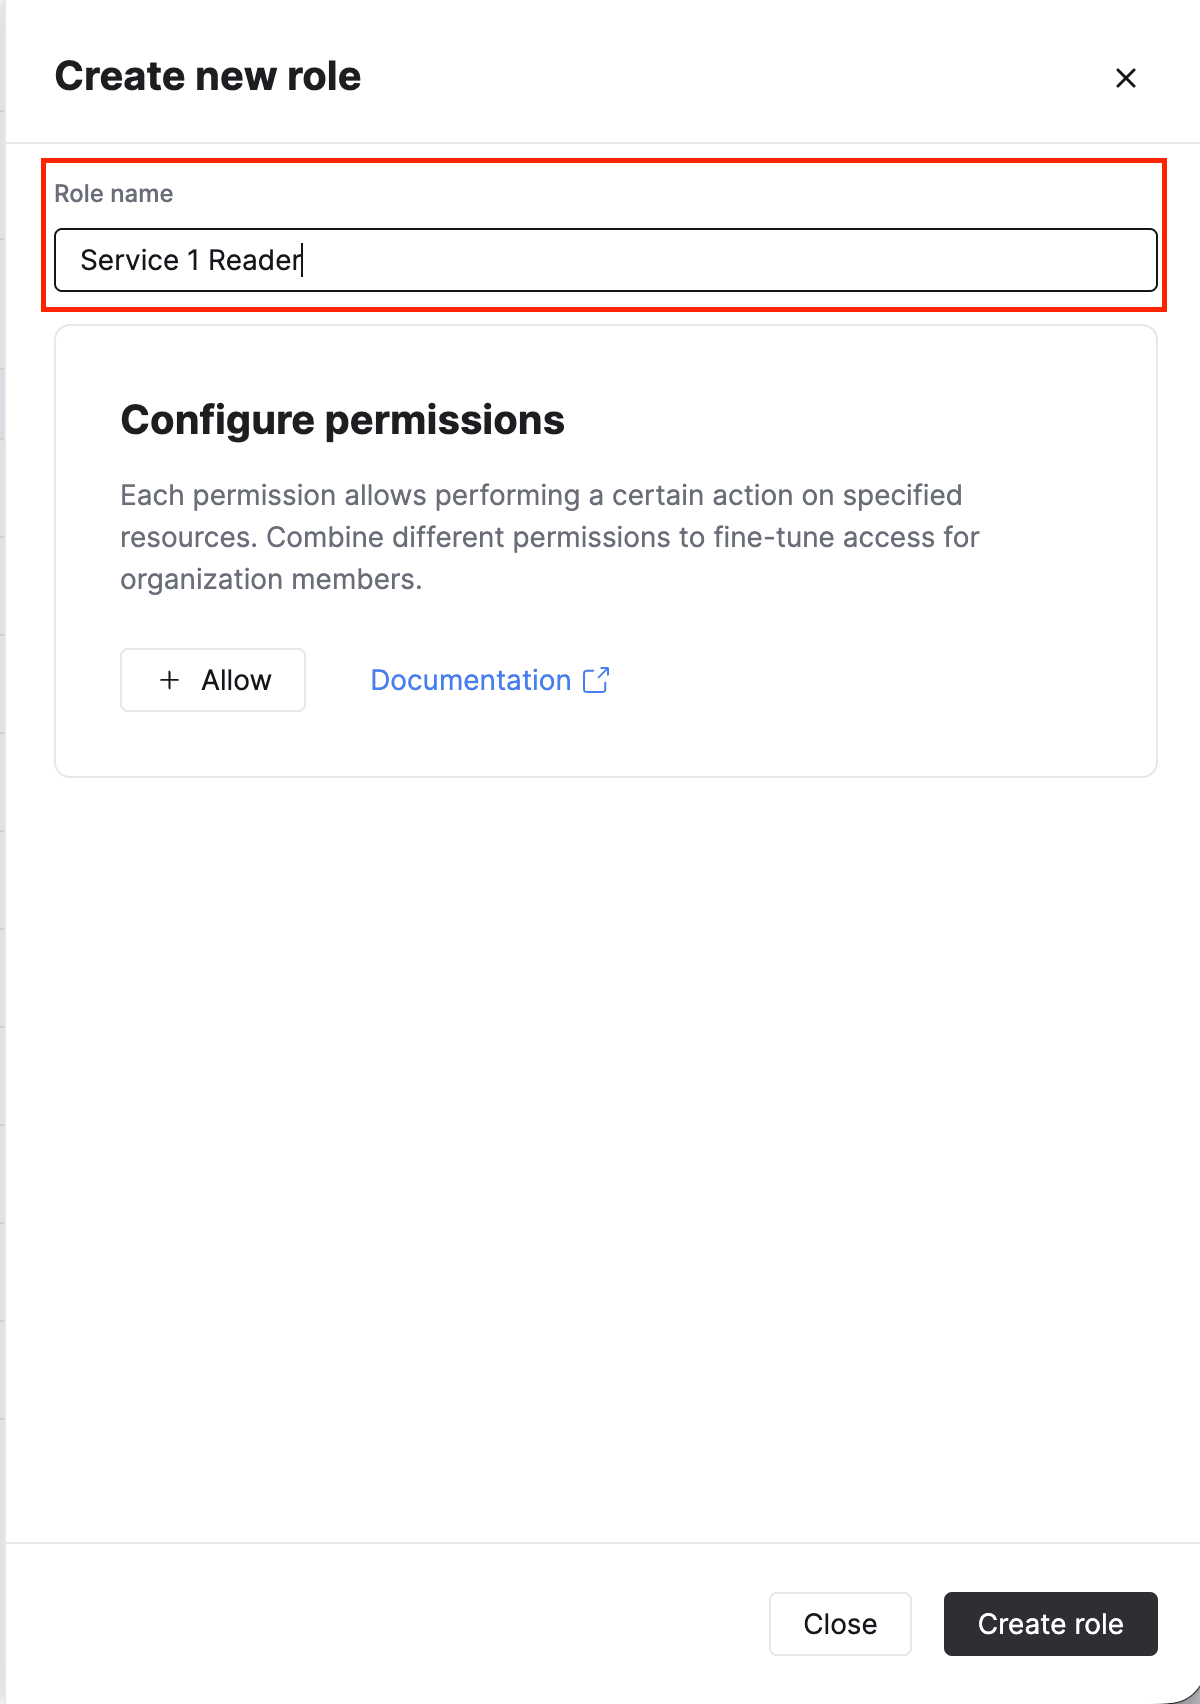
Name the role
Enter a descriptive role name. This will be the name you will see when assigning roles to users and API keys.
[object Object]
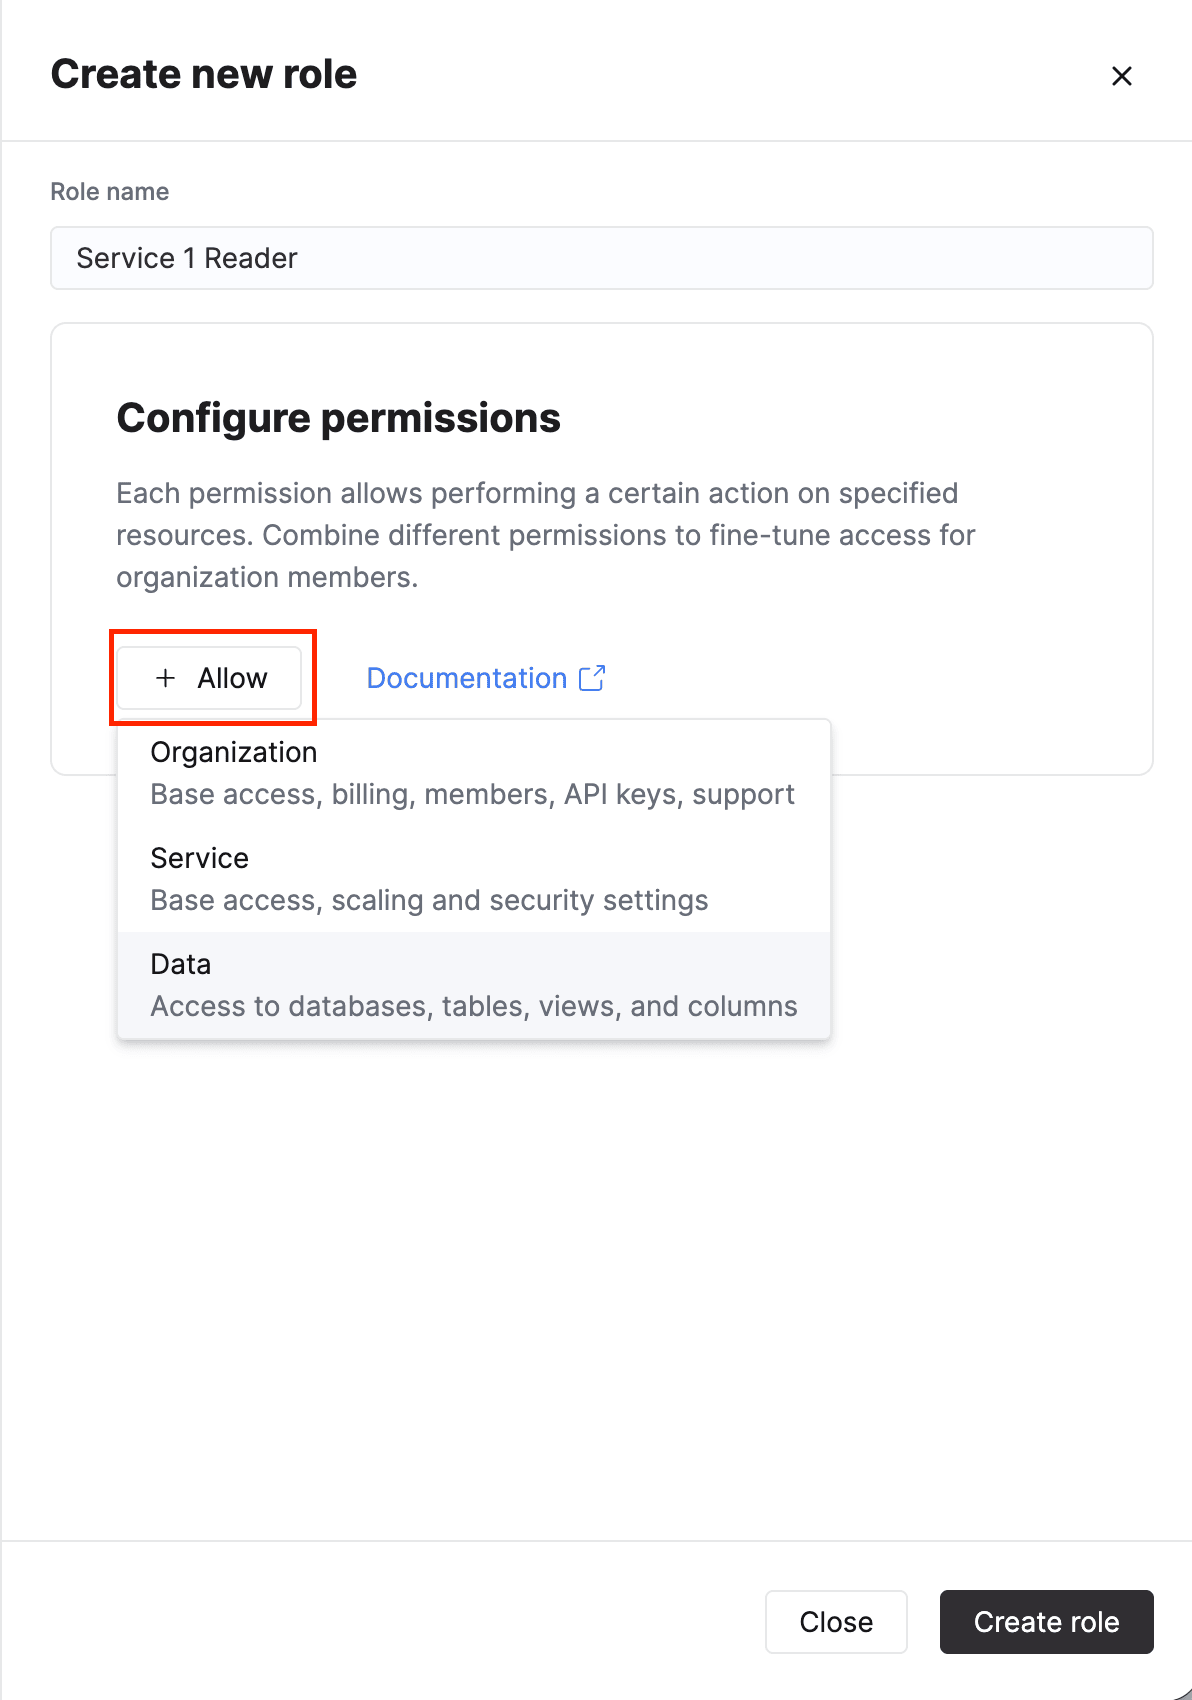
Click the Allow button and select from Organization, Service, and/or Database permissions. For a description of all permissions, see Console roles and permissions.
Review your new role
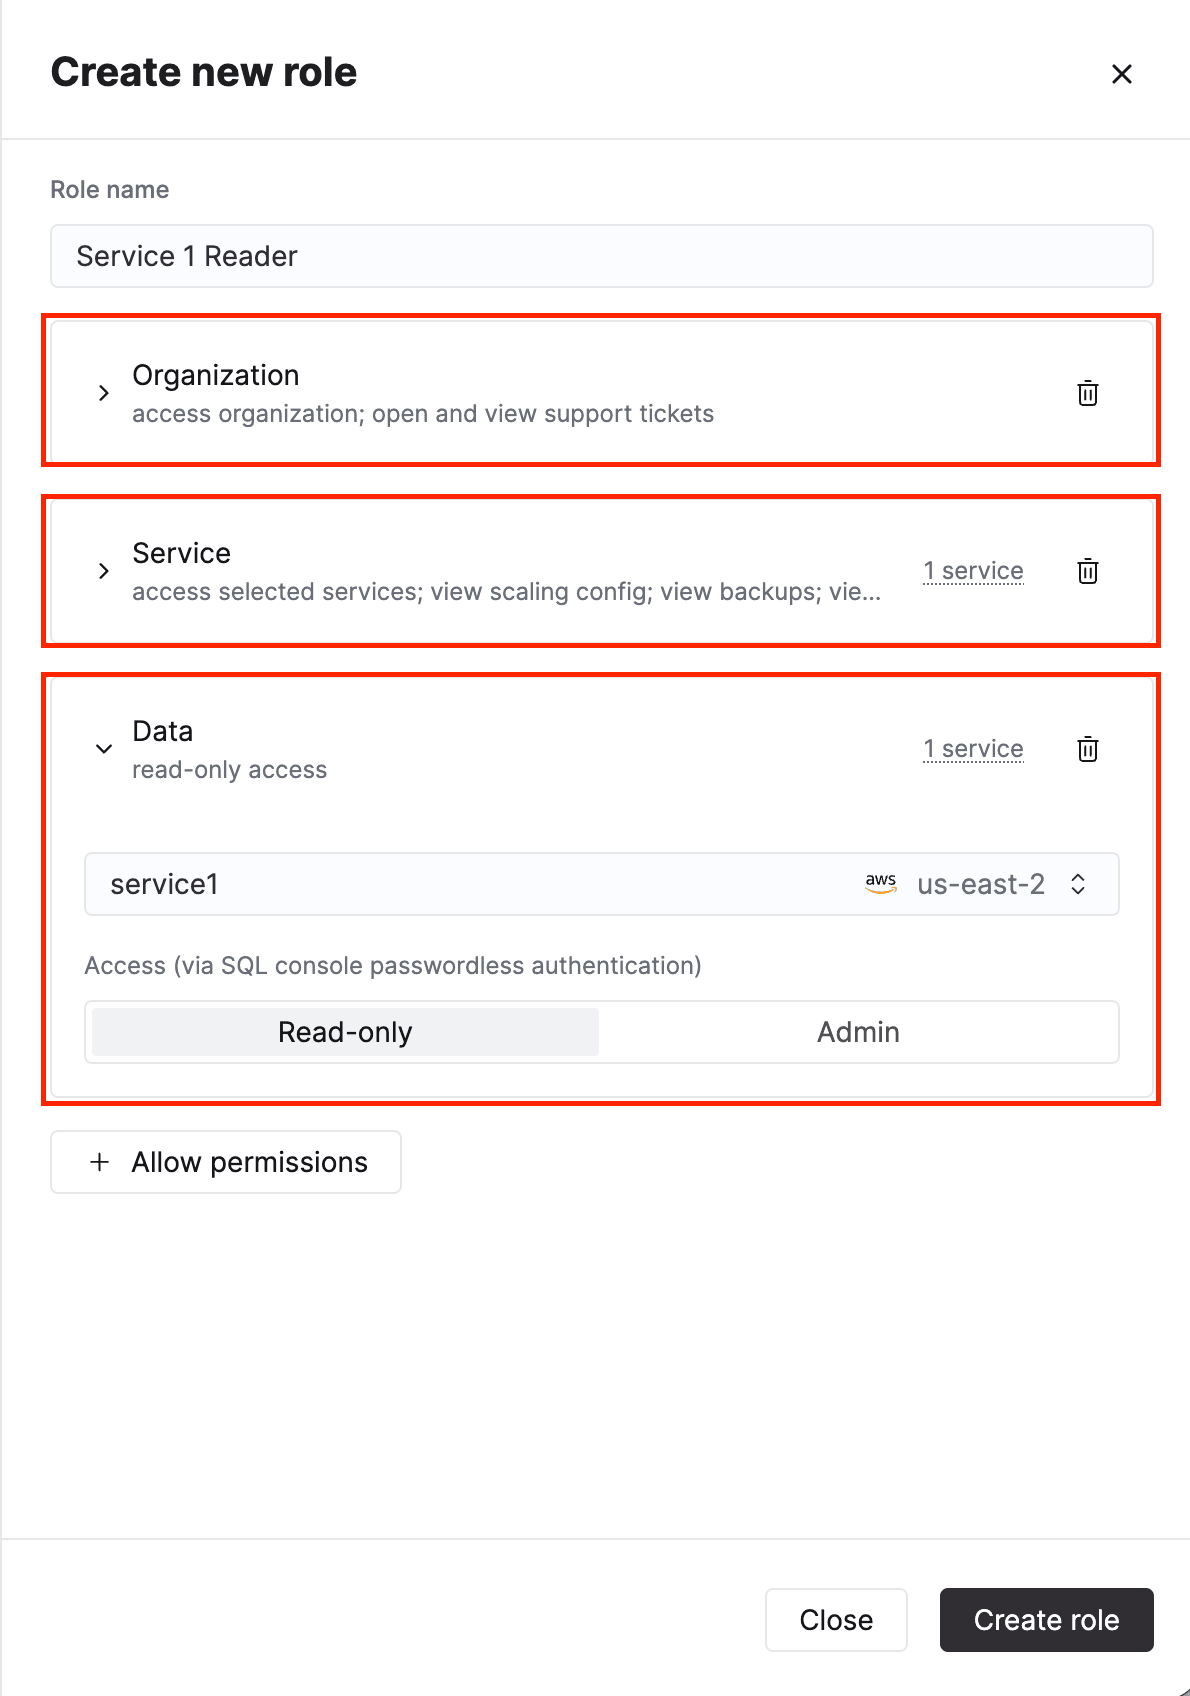
Review permissions assigned to your new role before finalizing. Click Create role when done.
Manage database roles (beta)
Beta featureIn addition to console permissions, custom roles can include data permissions that control access to the databases of selected services. This lets you manage console and database access in one place instead of maintaining separate roles in each database.
When you add data permissions to a custom role, ClickHouse Cloud creates a matching role in each selected service, prefixed with cloud:. For example, a custom role named readonly appears in the database as cloud:readonly. Members of the custom role receive these database permissions when they connect to the service through SQL console passwordless authentication.
Prerequisites
Custom database roles on a service depend on JWT authentication and are not applied while it is disabled. Before adding data permissions to a role, navigate to the service, open Settings, and find the JWT authentication card in the Security section. Make sure the SQL Console toggle is enabled.

Add data permissions to a role
Create a custom role or edit an existing one. In the role dialog, click the Allow permissions button and select Data.
Select the service
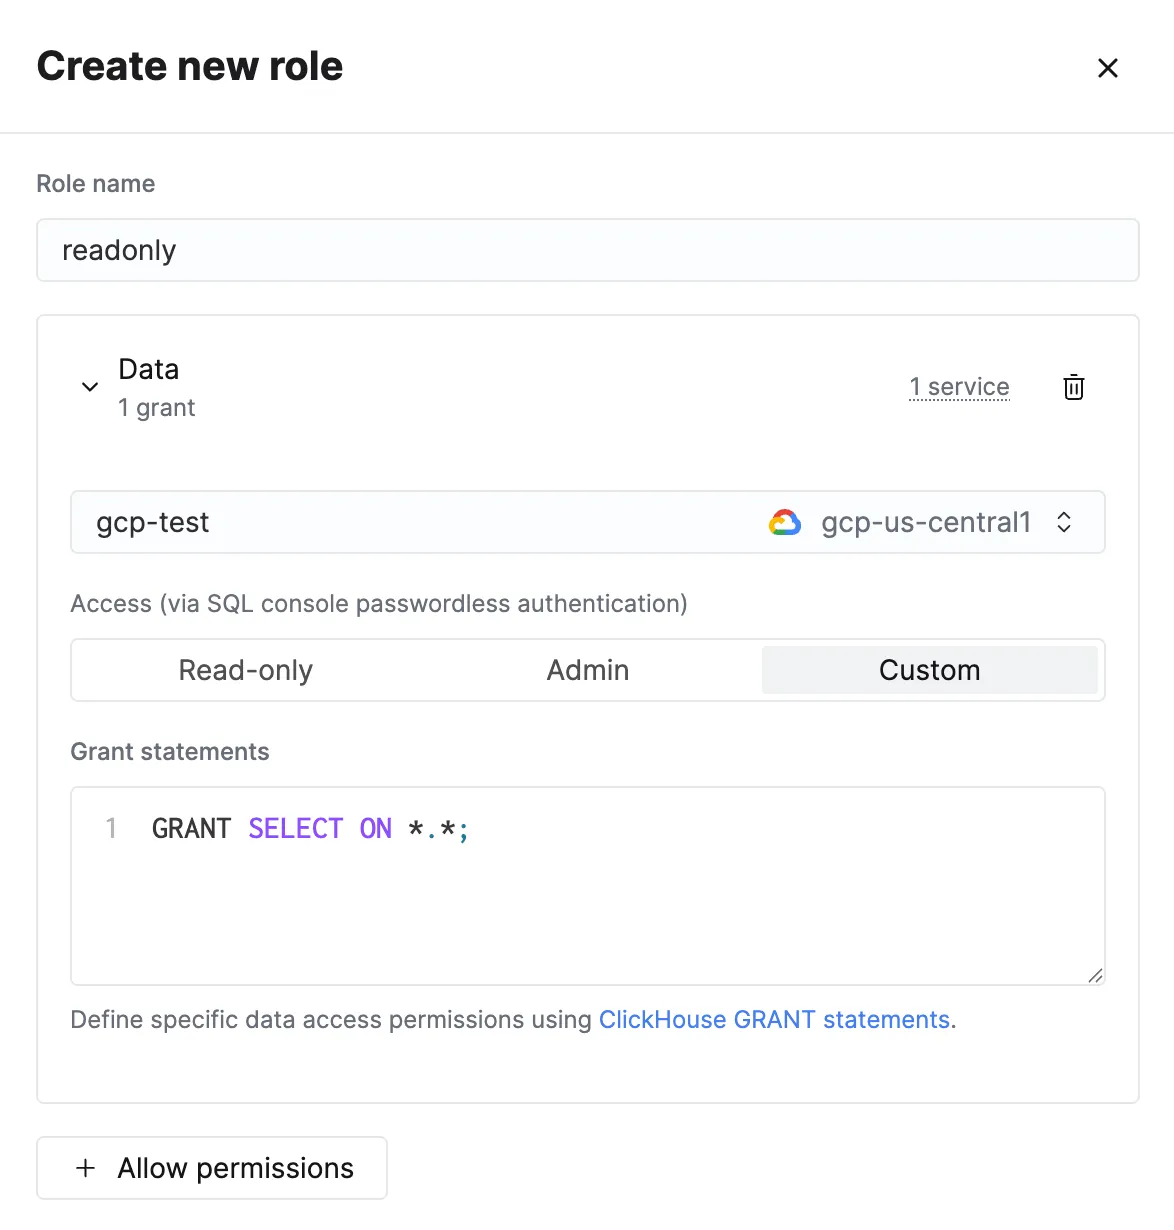
Select the service the permissions apply to. Add more services to apply the same Read-only or Admin permissions across multiple services.
Choose the access level
Select Read-only, Admin, or Custom access. With Custom access, define specific data access permissions using ClickHouse GRANT statements. Custom access can only be selected when the permissions target a single service; to define custom permissions for multiple services, add a separate Data permission for each service.
Create the role
Click Create role. The database roles are created in the selected services. The roles can take up to 10 minutes to propagate to a service, but users assigned the role receive its permissions immediately when they query the service.
Verify database roles
Roles managed through the console are created in the database with the cloud: prefix and the cloud storage type, and can take up to 10 minutes to appear after creation. To list them, query the system.roles table in the service:
SELECT * FROM system.roles;┌─name───────────┬─id───────────────────────────────────┬─storage─┐
│ cloud:readonly │ 9a4910f4-abcf-4904-466a-717c8c75ac42 │ cloud │
└────────────────┴──────────────────────────────────────┴─────────┘Update custom roles
Custom roles may be updated after they’re created. Users will lose any permissions removed from the role and will gain any permissions added.
- Access organization settings and select
Users and roles - Select the
Rolestab - Select the three dots next to the role you would like to update
- Select
Edit - Modify the permissions
- Select
Edit role
Delete custom roles
Custom roles may be deleted at any time.
- Access organization settings and select
Users and roles - Select the
Rolestab - Select the three dots next to the role you would like to delete
- Review the users and API keys that will lose access when the role is removed. Adjust assignments as needed.
- Select
Delete roleto complete the process