

 Set up docs MCP
Overview: The ClickHouse JDBC Bridge in combination with the jdbc table function or the JDBC table engine allows ClickHouse to access data from any external data source for which a JDBC driver is available:
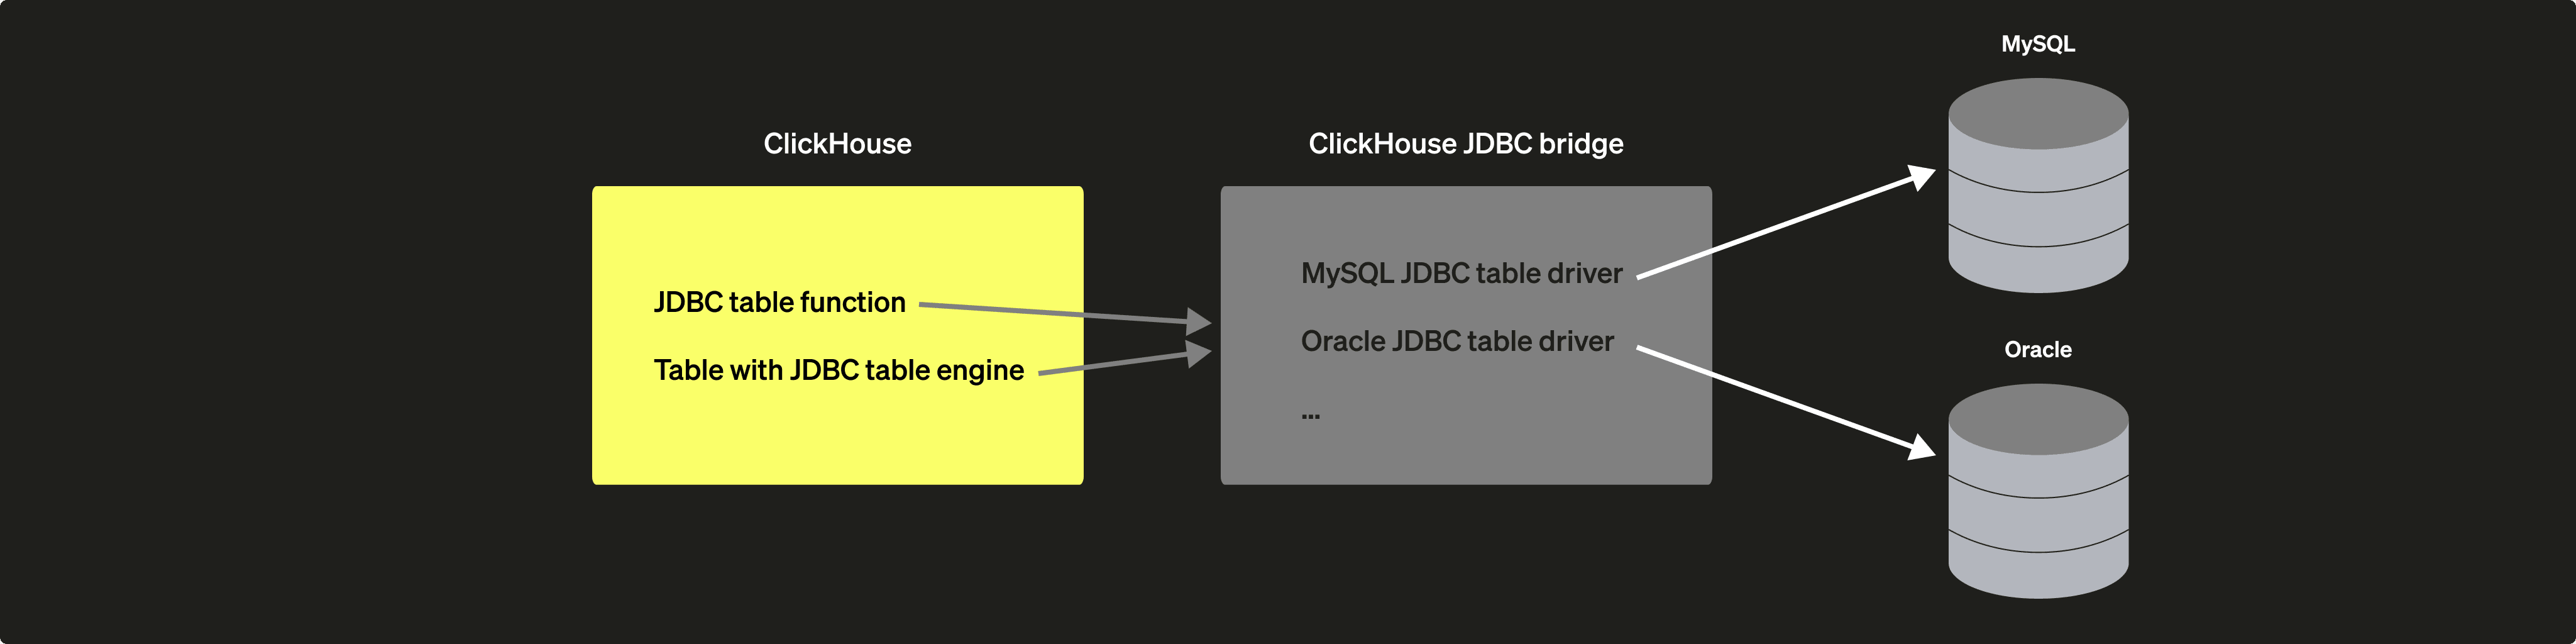
This is handy when there is no native built-in integration engine, table function, or external dictionary for the external data source available, but a JDBC driver for the data source exists.
You can use the ClickHouse JDBC Bridge for both reads and writes. And in parallel for multiple external data sources, e.g. you can run distributed queries on ClickHouse across multiple external and internal data sources in real time.
In this lesson we will show you how easy it is to install, configure, and run the ClickHouse JDBC Bridge in order to connect ClickHouse with an external data source. We will use MySQL as the external data source for this lesson.
Let’s get started!
Install the ClickHouse JDBC Bridge locally
The easiest way to use the ClickHouse JDBC Bridge is to install and run it on the same host where also ClickHouse is running:
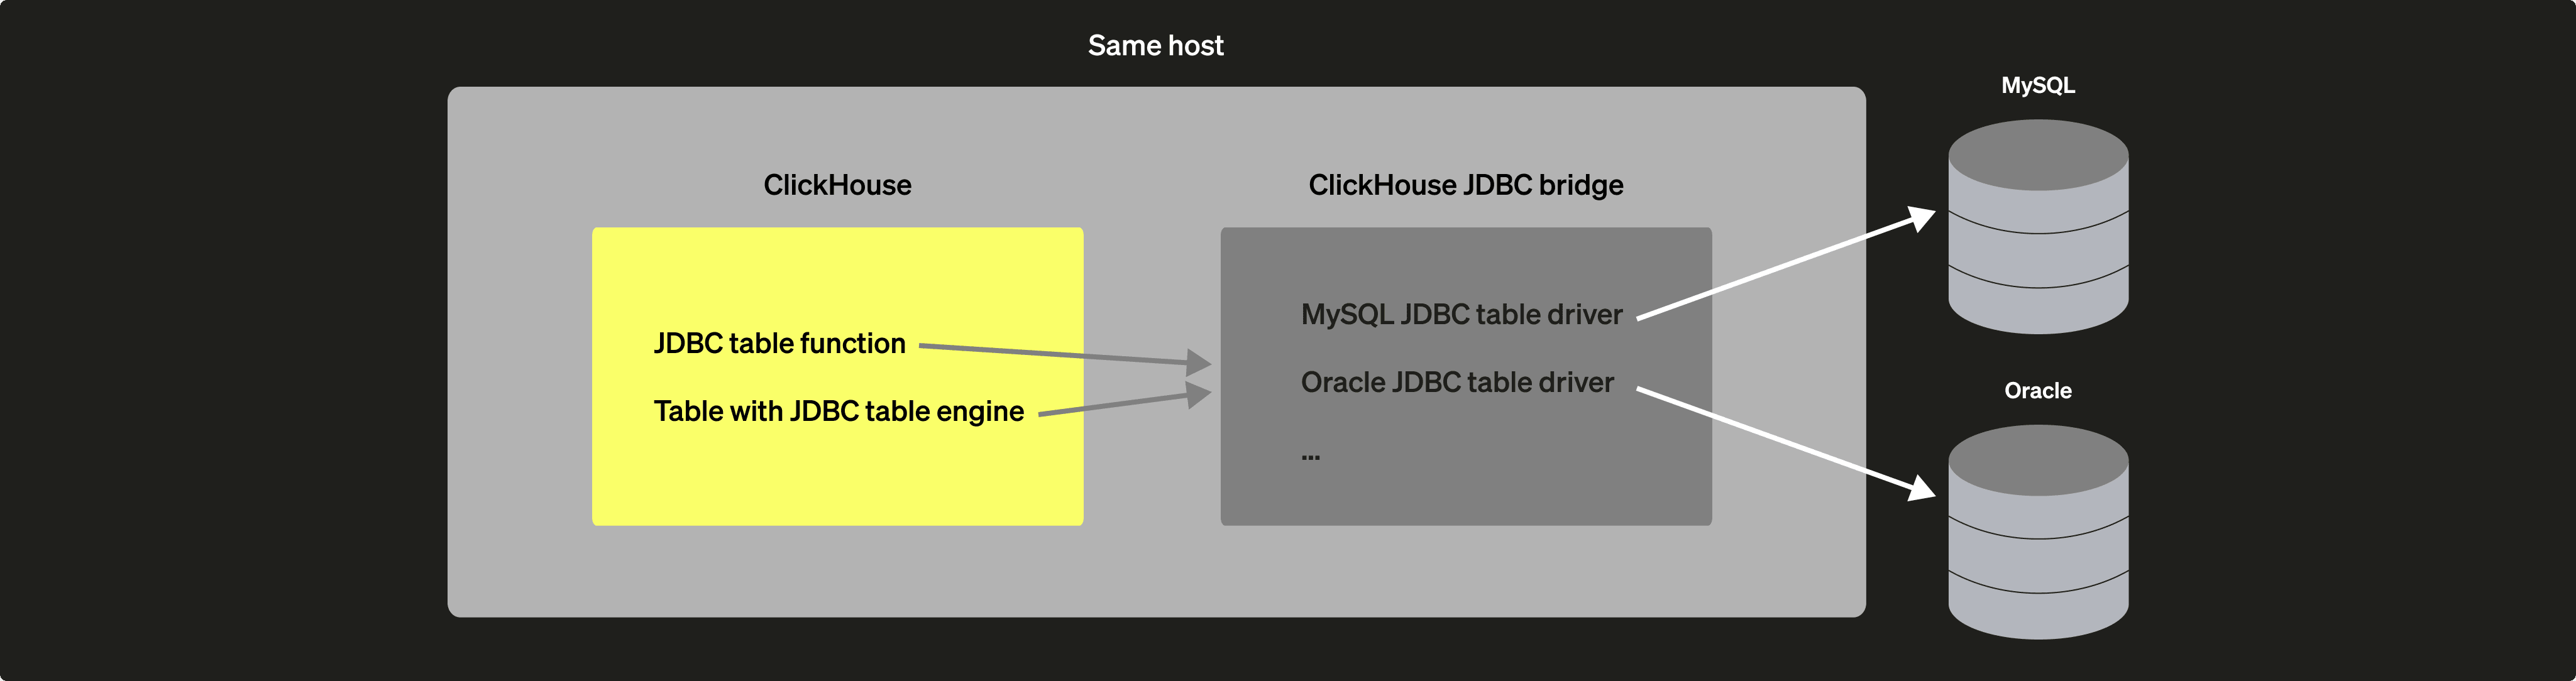
Let’s start by connecting to the Unix shell on the machine where ClickHouse is running and create a local folder where we will later install the ClickHouse JDBC Bridge into (feel free to name the folder anything you like and put it anywhere you like):
mkdir ~/clickhouse-jdbc-bridgeNow we download the current version of the ClickHouse JDBC Bridge into that folder:
cd ~/clickhouse-jdbc-bridge
wget https://github.com/ClickHouse/clickhouse-jdbc-bridge/releases/download/v2.0.7/clickhouse-jdbc-bridge-2.0.7-shaded.jar
In order to be able to connect to MySQL we’re creating a named data source:
cd ~/clickhouse-jdbc-bridge
mkdir -p config/datasources
touch config/datasources/mysql8.json
You can now copy and paste the following configuration into the file ~/clickhouse-jdbc-bridge/config/datasources/mysql8.json:
{
  "mysql8": {
  "driverUrls": [
    "https://repo1.maven.org/maven2/mysql/mysql-connector-java/8.0.28/mysql-connector-java-8.0.28.jar"
  ],
  "jdbcUrl": "jdbc:mysql://<host>:<port>",
  "username": "<username>",
  "password": "<password>"
  }
}Now we’re ready to start the ClickHouse JDBC Bridge:
cd ~/clickhouse-jdbc-bridge
java -jar clickhouse-jdbc-bridge-2.0.7-shaded.jarUse the JDBC connection from within ClickHouse
ClickHouse can now access MySQL data by either using the jdbc table function or the JDBC table engine.
The easiest way to execute the following examples is to copy and paste them into the clickhouse-client or into the Play UI.
- jdbc Table Function:
SELECT * FROM jdbc('mysql8', 'mydatabase', 'mytable');- JDBC Table Engine:
CREATE TABLE mytable (
     <column> <column_type>,
     ...
)
ENGINE = JDBC('mysql8', 'mydatabase', 'mytable');

SELECT * FROM mytable;Install the ClickHouse JDBC Bridge externally
For a distributed ClickHouse cluster (a cluster with more than one ClickHouse host) it makes sense to install and run the ClickHouse JDBC Bridge externally on its own host:
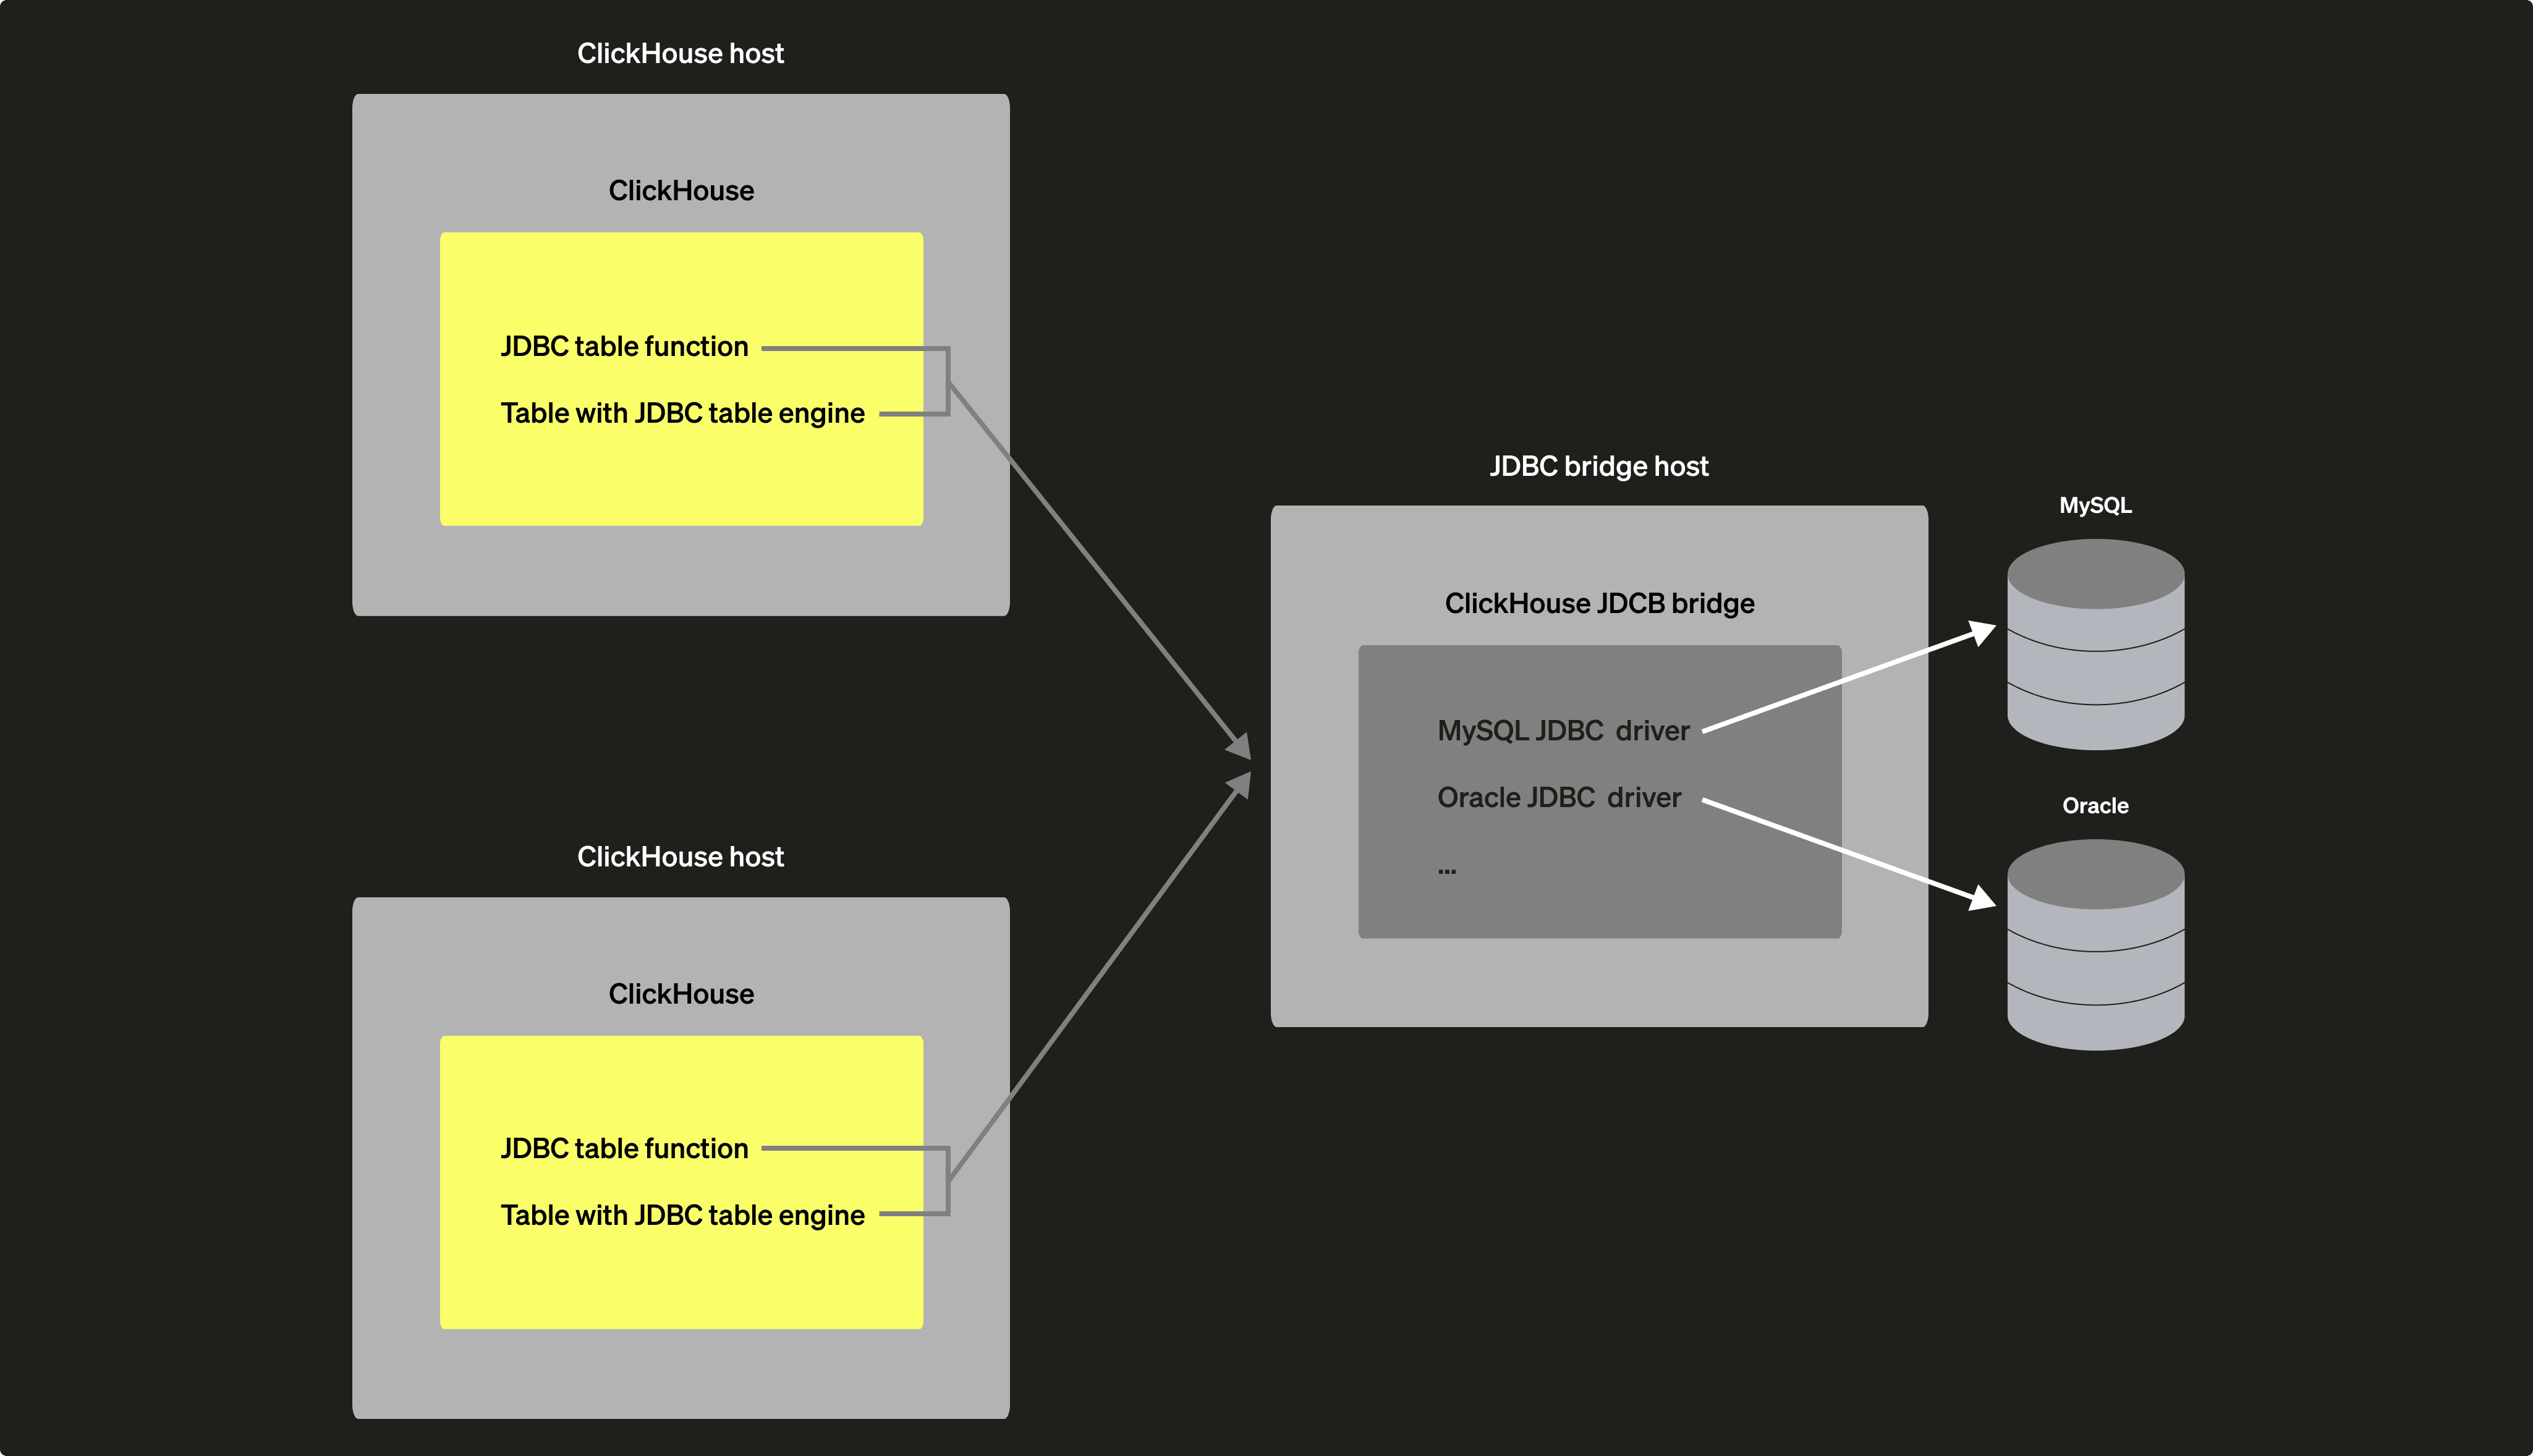
This has the advantage that each ClickHouse host can access the JDBC Bridge. Otherwise the JDBC Bridge would need to be installed locally for each ClickHouse instance that is supposed to access external data sources via the Bridge.
In order to install the ClickHouse JDBC Bridge externally, we do the following steps:
-
We install, configure and run the ClickHouse JDBC Bridge on a dedicated host by following the steps described in section 1 of this guide.
-
On each ClickHouse Host we add the following configuration block to the ClickHouse server configuration (depending on your chosen configuration format, use either the XML or YAML version):
<jdbc_bridge>
   <host>JDBC-Bridge-Host</host>
   <port>9019</port>
</jdbc_bridge>jdbc_bridge:
host: JDBC-Bridge-Host
port: 9019